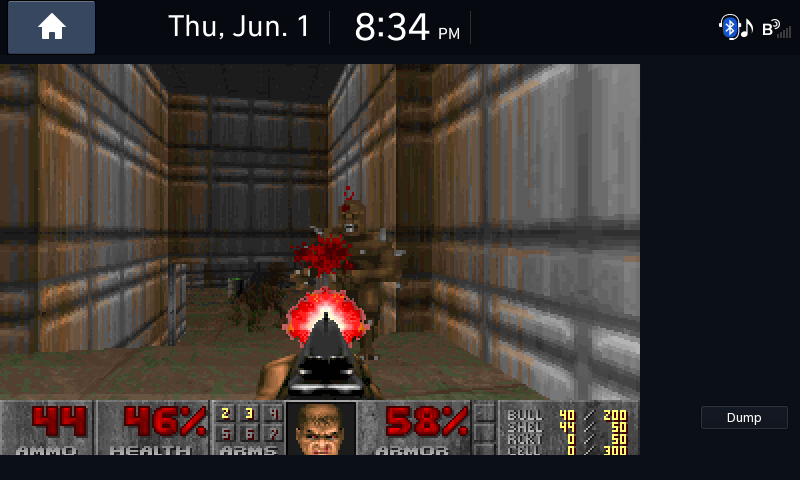
How I Hacked my Car Part 6: Nothing to it but to Doom it.
If you haven’t read the earlier parts, please do so.
The background⌗
There is a long standing tradition among hardware hackers and tinkerers. Once a platform is hacked, once a gadget is tinkered with, once a device is understood there will always be someone who asks a certain, specific question. And that question is: “Can it run Doom?”
Doom (1993)⌗
Doom (1993) is a first person shooter made by id Software which was originally made for MS-DOS. Doom was one of the games that helped define the first person shooter genre. It was in fact so defining that one of the early terms for first person shooter games was “Doom clones”.
Doom was also made in a time where computers were very weak, at least compared to today. A time where CPUs were measured in megahertz instead of gigaherz, and memory was defined in megabytes instead of gigabytes.
Due to the concept of linear time, it was limited to the technology of its day. Because of these limitations Doom was written to be highly optimized and portable. In the end, it ran very well on these relatively weak machines.
In late 1997, the source code for Doom was released.
This combination of an open source, impressive, but still easy-to-run game made the perfect storm of an app that can be ported to nearly anything with a screen.
And because the internet is the internet, memes eventually formed around the idea that nearly any gadget or gizmo can run Doom. Whether it be running on a thermostat, an oscilloscope, a desk phone, or even a pregnancy test.
Because I am but a humble hacker on the internet desperate for that sweet, sweet internet clout. I of course had to port Doom to my hacked car.
The port⌗
Using the information that can be found in part 3. I set up the QTCreator IDE for DAudio2 development and used my DAudio2 Gui Template Application as a starter template.
There are many flavors of Doom and Doom look-alikes, and many ports of those that can be used as a starting ground for new ports. I decided to go with doomgeneric, a version of Doom specifically made to be easily portable.
doomgeneric claimed all I had to do was create a doomgeneric_myPlatform.cpp file and implement 5 simple functions and just like that, Doom would be ported.
“All I had to do” Joke #5⌗
Yeah it wasn’t that simple, but also it wasn’t not that simple. Like how many programming projects end up, there were a number of roadblocks and difficulties I hit along the way.
But for now, back to the start:
There were 5/6 functions I needed to/could implement:
| Function | Description |
|---|---|
| DG_Init | Platform-specific initialization (Creating window, allocating buffers, etc..) |
| DG_DrawFrame | Draw the frame from the framebuffer to the window |
| DG_SleepMs | Sleeping in milliseconds |
| DG_GetTicksMs | Getting the ticks that passed since the launch in milliseconds |
| DG_GetKey | Provide keyboard inputs to Doom |
| DG_SetWindowTitle | Set the window title (Not applicable in this case) |
doomgeneric helpfully had a few example ports. One of them being an X11/xlib port. The port had pretty generic implementations of DG_SleepMs(), DG_GetTicksMs(), and some nice helper methods to make DG_GetKey() easier. I decided to copy these for my port.
This left 3 functions to implement, DG_Init(), DG_DrawFrame(), and some DG_GetKey() logic.
I created my doomgeneric_daudio.cpp file and started with the initialization logic.
Startup⌗
To keep things simple I created my main() function in this file and copied over the code to initialize my TestGuiApplication from my template code. I also renamed all of my “Test” placeholder texts with “Doom”.

At this point I decided I didn’t need a seperate DG_Init() function to initialize things when I have a main() function. I removed it and moved the couple of things that were in there into main(). Following the instructions in doomgeneric’s Readme.md, I added a call to doomgeneric_Create();
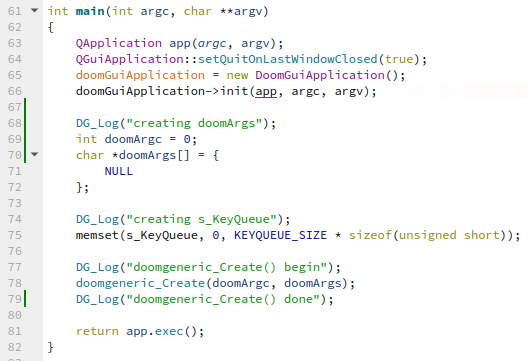
There were a couple of complications I had while creating this main() function, even with how simple it was. The main one was the argument handling.
DAudio2 GUI applications work a little weird. They can’t be just started from a command line like in most linux distributions. Their launching is handled by a window manager called Helix, and the format of the arguments is standardized to allow for launching specific AppViews or AppServices in the application.
Because of this I couldn’t just pass along the normal arguments into doomgeneric_Create() as it could have unintended side effects. Because this was a silly little demo I simply hard-coded my own arguments and passed those along.
Pretty Pictures?⌗
The next step was drawing frames onto the screen.
After some research I found out I can use a QLabel to display a framebuffer through this process:
- Use the framebuffer to generate a QImage
- Use the QImage to make a QPixmap
- Use the QPixmap as the QLabel’s background image
The buffer that doomgeneric writes to is called DG_ScreenBuffer. I made a field on my MainWindow called bufferQImage and set it up to reference DG_ScreenBuffer. I then used it to make a QPixmap which is used as the background image for my displayLabel.

I also needed to update this QLabel whenever there was a new frame to render. I made a function called refreshDrawingBuffer which called the update function on my displayLabel. Based on my research this should cause the QLabel to redraw itself.

I wired up the DG_DrawFrame() function to call the refreshDrawingBuffer() function and I set up a QTimer to repeatedly call the doomgeneric_Tick() function which should make the game run.
Did it work?⌗
I should have now had the code needed to draw and run the Doom demo.
In order to test this I needed to get a WAD file. WAD files are the Doom engine’s game data files. They contain the levels, maps, enemies, and textures used in the game. I found the original DOOM.WAD file and downloaded it to my flash drive.
In order for the Doom engine to load this WAD file I had to tell it where the file would be. I hardcoded a path in my arguments that tells Doom to read “/appdata/DOOM.WAD”.
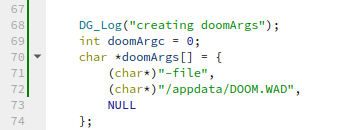
I compiled the application and went into my car.
In order for my app to be registered by Helix, I would have to add an .appconf file for it in the /etc/appmanager/appconf folder. I created a DAudio2Doom.appconf file with the following contents and copied it into the folder:
[Application]
Name=com.greenluigi1.doom
Exec=/appdata/DAudio2Doom

[DoomAppView]
# ComponentName : com.greenluigi1.doom.DoomAppView
Type=AppView
Then I ran the following to copy over my DAudio2Doom compiled binary, mark it as executable, reboot the system so it can read the new .appconf file, and finally start the application.
cp /run/media/B208-FF9A/DAudio2Doom /appdata

chmod +x /appdata/DAudio2Doom

reboot

appctl startAppView com.greenluigi1.doom.DoomAppView
After running the last command, the app launched and it quickly became apparently that it wasn’t working.
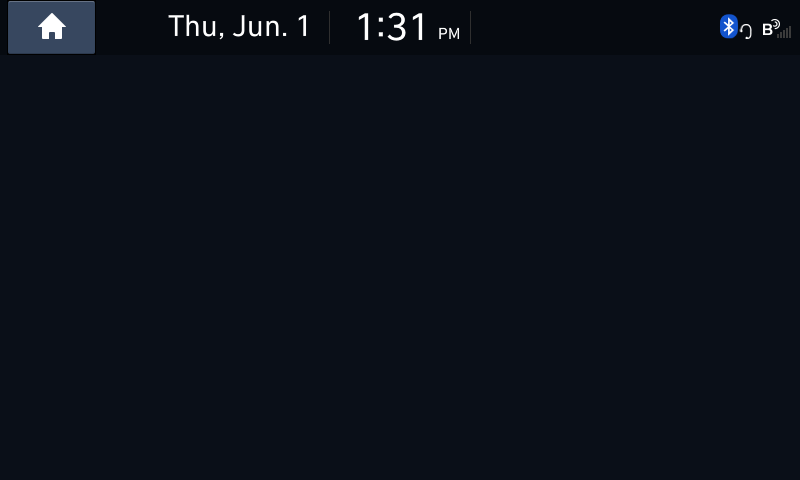
A completely blank screen was shown when I was expecting the first frame of Doom.
Then the entire head unit rebooted…
Debugging on this platform is a bit difficult because of how Helix launches the apps. So my current method of debugging is putting logging statement everywhere.
So to figure out what went wrong, it was time to log everything.
I created a couple of methods to help with logging and then called them from Doom’s logging functions
void DG_Log(const char* logMessage)
{
    __android_log_print(ANDROID_LOG_DEBUG, "DAudio2Doom", logMessage);
}

int DG_Log_printf(const char *__restrict __format, ...)
{
    int result;
    va_list args;
    va_start(args, __format);
    result = __android_log_vprint(ANDROID_LOG_DEBUG, "DAudio2Doom", __format, args);
    va_end(args);

    return result;
}

int DG_Log_vprintf(const char *__restrict __format, va_list ap)
{
    return __android_log_vprint(ANDROID_LOG_DEBUG, "DAudio2Doom", __format, ap);
}
After running it again and extracting the logs, I found a couple of issues, like how I forgot to copy over the DOOM.WAD file. I also found out that when Doom encounters and error like not finding a valid WAD file, it calls the abort() function.
After the app aborted itself, the app watchdog in the head unit figured out that the app broke and restarted the head unit after a few seconds.
I disabled the abort() call and copied over the WAD file. I updated the binary, and started the app only to find another blank screen. It still could not find the WAD file. I tried a couple of things like changing the arguments (using “-iwad” instead of “-file”) but nothing worked. So, I updated the D_FindIWAD() function to just always return the hardcoded path “/appdata/DOOM.WAD”, which got rid of the error.
But the blank screen remained. I was still missing something.
I took an educated guess that something was wrong with the framebuffer or how I was reading it. The first thing I checked was the format of the framebuffer.
Framebuffer Format⌗
A framebuffer is a just a bunch of color data that forms an image. When storing color information you have to pick a format. The format dictates how much data each pixel takes up, what types of color information is stored, and what order are the colors stored in.
I was currently using QImage::Format_ARGB32 which meant QT was expecting the data to be stored in the following format:
- Alpha (Transparency): 1 byte
- Red: 1 byte
- Green 1 byte
- Blue 1 byte
Which makes a total of 4 bytes (Or 32 bits) of color data per pixel.
But I wasn’t even sure if that was right, it was only a guess at the time.
So I looked at the examples provided by doomgeneric and saw a reference to the SDL format of RGB888.
texture = SDL_CreateTexture(renderer, SDL_PIXELFORMAT_RGB888, SDL_TEXTUREACCESS_TARGET, DOOMGENERIC_RESX, DOOMGENERIC_RESY);I updated my code to use the QImage::Format_RGB888 format and ran it.
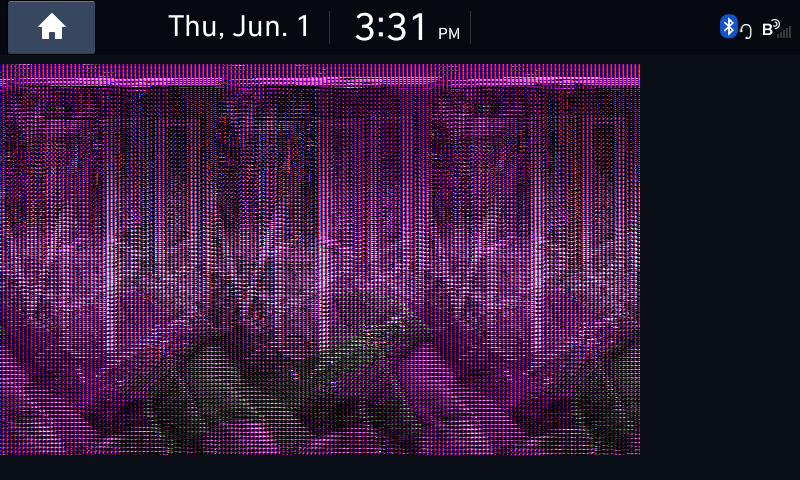
I could at least see there was something there. It was pretty recognizably the Doom start screen, just really mangled.
I cycled through a couple of other QImage::Formats but nothing appeared to work. I also looked through Doom’s code and it looked like each pixel should be ARGB, but as I saw before that didn’t work.
In order to figure out the format for sure I added a “Dump” button which would dump the contents of the DG_ScreenBuffer to my flash drive.

After loading up the app once again I dumped the framebuffer and use a tool called RAW pixels viewer to view the data.
After fiddling with the parameters I eventually got a working image. The head unit was running doom the entire time, it just wasn’t displaying properly! It was also clearly running the game demo which means the game tick function was working correctly.
![]()
The format of the image is BGRA, ignoring the alpha color channel.
Here is it if we do not ignore the Alpha channel:
![]()
Doom does not process any transparency data, so the alpha channel was always set to 0. This means my program was reading it as fully transparent. Which is why I had a blank screen on certain formats.
It was displaying the image “correctly”, it was just that it was invisible. :|
With this information it was clear I had two issues with my code. One was the format, and the other was why the image was not updating on the screen.
I set the format to be QImage::RGB32 which should read only the RGB and ignore the Alpha channel. The reason the format is not written as QImage::BGR32 is because the head unit uses little endian format. Effectively this means the channels are stored and read in reversed order, aka BGR instead of RGB which was exactly what I wanted.
Next, I had to figure out why the image wasn’t updating on the screen. After a couple of hours of googling and testing various things, I figured out that the update call would not refresh the QLabel’s image unless the QPixmap itself was updated. I then changed the function to repeatedly set the QLabel’s Pixmap to the bufferQImage I made earlier.

It is… Beautiful⌗
After launching the new binary I was greeted with the beautiful sight of Doom running in my car.
Now I just needed to hook in some inputs and I would be playing in no time!
The Fun Part - Inputs⌗
I decided that I would try to make this port as fun as possible by incorperating some of the inputs that are connected to the head unit instead of just hooking up a boring-old keyboard.
As mentioned in previous posts I found a plethora of header files in an older firmware update that gives me access to many APIs that interact with the vehicle. Unfortunately, these header files are no longer provided within the latest firmware updates. But luckily, Hyundai hasn’t really updated anything worthwhile so the old header files still work.
(Pst. Don’t tell Hyundai but you can still find the files in the latest Korean version of the firmware just click the dark blue button that has the “DN8” text. The update is even unencrypted so you can just extract the zip and the grab the system.img file directly. Do note that the update is older so your millage may vary if they work or not.)
I looked through many of the files and noted down some of them that could be used for inputs in the game. The following were ones that caught my eye:
HChassis::getSteeringAngle(); // Or IHChassisListener::onSteeringAngleChanged();
HChassis::getAcceleratorPedalState(); // Or IHChassisListener::onAcceleratorPedalStateChanged();
HBody::isTurnSignalSwitchOn(); // Or IHBodyListener::onTurnSignalStateChanged()
IHModeChangeListener::onKeyEvent();
HSeat::isSeatBeltBuckleLatched();
I initially tried the IHChassisListener and IHBodyListener callback functions. Unfortunately I could not get them to work, so I went with checking the get() functions directly.
Using the Dump button I made earlier I hooked into each of the functions and checked to see if they worked.
| Function | Result |
|---|---|
| HChassis::getSteeringAngle() | Received number between 0-6553.5 indicating steering wheel position. |
| HChassis::getAcceleratorPedalState() | Always returned 0. |
| HBody::isTurnSignalSwitchOn() | Received seemingly random values with no bearing on the turn signal switches. |
| IHModeChangeListener::onKeyEvent() | Received key numbers indicating what button on the head unit or steering wheel was pressed and a state value indicating if it was pressed, released, long pressed, or long released. |
| HSeat::isSeatBeltBuckleLatched() | Recevied a True/False value if the specified seat belt buckle was latched. |
3/5 isn’t the best, but the ones that worked were the most important ones anyways.
With this new information I mapped the following inputs to Doom:
| Vehicle Input Location | Vehicle Input | Doom Input |
|---|---|---|
| Steering Wheel | Turning wheel Left | Left Arrow Key |
| Steering Wheel | Turning wheel Right | Right Arrow Key |
| Steering Wheel | Seek Down Key (Which is actually the up key) | Up Arrow Key |
| Steering Wheel | Seek Up Key (Which is actually the down key) | Down Arrow Key |
| Steering Wheel | Mute Button | Use |
| Steering Wheel | End Call Button | Fire |
| Head Unit | Volume Knob Press | Enter |
| Head Unit | Tune Knob Press | Escape |
I then hooked these inputs into Doom using the key queue which was provided in doomgeneric’s X11 example code.
Can it run Doom? Yes It Can!⌗
And just like that I had a working installation of Doom running on my car.
Is it perfect? No, first there is no audio and I will admit that the inputs are not the best. Some of the keys I used are also received by background applications and will do things like change the song if you are trying to move forward. As long as no media source is playing though (By pressing the volume knob in) it works well enough.
Oh, and the tires do move when turning the steering wheel, so it is best to not do any long playthroughs or you will grind your tires down. :p
But for the little demo it is, it sure is fun!
The Future of My Car Hacking Adventures⌗
I am no fortune teller and do not know what the future holds. But at least regarding my head unit, I have accomplished most of the things I wanted to do.
I still have a couple of app ideas I may explore in the future and if new firmware updates are released I will try to crack those too.
But until then, I will be busy playing Doom.
